Design & Cut a Beautiful Infinity Love Sign in Under 5 Minutes
Learn how to design a symmetrical Infinity Love sign for CNC cutting in under 5 minutes using SketchPath.io’s intuitive curve and merging tools.

Designing a beautiful Infinity Love Sign in Under 5 minutes.
Looking for the perfect personalized gift? The Infinity Love sign is a timeless project for CNC makers, and with SketchPath.io, you can go from a blank canvas to a cut-ready G-code file in less than five minutes.
See, Clone and Customize the final Design directly in SketchPath.
In this guide, we’ll walk through the workflow from our latest video tutorial, showing you how to master curve tools, symmetrical alignment, and pocketing operations.
Step 1: Crafting the Infinity Base
We start by building the internal loops of the infinity symbol using the Curve Tool.
- Rough Sketching: Draw four points to create a high-level approximation of the shape. Don't worry about precision yet—we’ll fix that in the properties.
- Tangent Control: Select the shape to view exact parameters for each point, including angles and tangent handle lengths.
- Achieving Symmetry: To ensure a professional look, round your values. Points 1 and 3 (left and right) must share the same Y-position, while points 2 and 4 (top and bottom) must share the same X-position.
Pro Tip: Use the Mirror Tool to quickly verify that your loops are perfectly symmetrical.
Step 2: Building the Outer Profile
Once your inner shape is perfected, it’s time to create the "meat" of the sign.
- Duplicate & Resize: Duplicate your shape and move it across the canvas.
- Lock Aspect Ratio: Before resizing to create the outer part of the symbol, ensure you lock the aspect ratio to maintain the integrity of your curves.
- Merging Paths: Select your outer shapes and use the Merge function to join them into one continuous path.
- Merge Preview: SketchPath provides a quick preview of each merge type, so you know exactly what the final path will look like before committing.
Step 3: Integrating the Heart
A love sign isn't complete without a heart. While you could draw one, SketchPath’s Insert Shape library makes it faster.
- The Inset Heart: Duplicate and resize the heart to create an "inner heart". This will be used for a Pocketing Operation later to add depth to your design.
- Final Joins: Join the outer heart with the infinity symbol using the merge tools once more. If you make a mistake, you can always Decompose back to the original shapes and try again.
Step 4: Configuring the CNC Cut
With the design finished, we move to the technical setup.
Select Your Bit: For this project, we used a 6mm compression bit.
- Define Path Locations: This is critical for accuracy. Set your Outer Cuts to the "Outside" of the line and your Inner Cuts to the "Inside".
- The Pocketing Operation: Select the inner heart and change the operation type to Pocketing. You can even customize the pocketing angle and depth to suit your material.
From Browser to Workshop
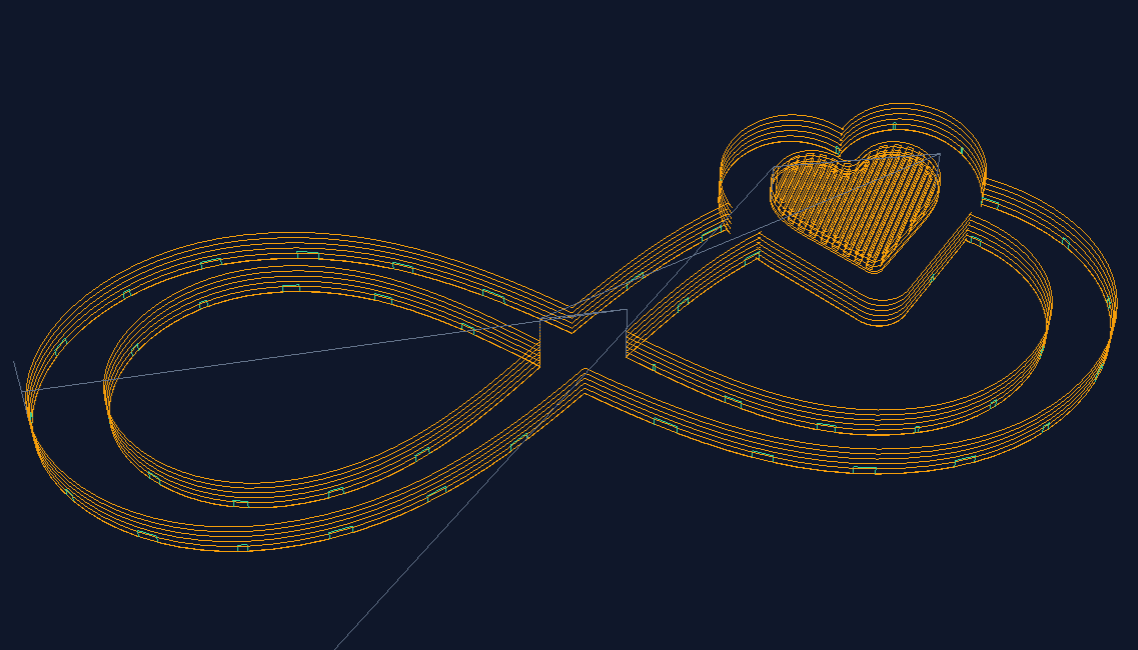
Before you head to the machine, use the 3D G-code Preview to inspect the toolpaths and the tabs that will hold your model in place during the cut.
Ready to start? Open app.sketchpath.io and follow along with the video to create your own Infinity Love sign today!
Happy Cutting!